ESXi Free – how to upgrade to ESXi 5.1 – ESX Virtualization.
ESXi Free – how to upgrade to ESXi 5.1
ESXi Free – the upgrade process to ESXi 5.1 free version
If you’re running the free version of ESXi 5.0 in your homelab or testing it at work, you might be wondering what’s the easy way to upgrade existing ESXi 5.0 installation to the latest ESXi 5.1 without much effort and without breaking your existing installation, without re-installing everything. Your existing VMs won’t be affected.
I’ve already wrote about patching ESXi without vCenter, but this time the command used slightly differ, and here I’m showing you the the steps which needs to be accomplished to upgrade to the latest ESXi 5.1 version. More advanced users can skip, because they’ll probably know this method.
This article is meant to be for every user who don’t uses vSphere update manager for this process. I’m writing it down here for my own bookmarking needs as well. -:)
As you might already read in my article about the changes to the ESXi, there isn’t any vRAM limitation on the free ESXi 5.1 but there is still the 2 physical CPU limit together with the 32Gb physical RAM limit. If not I’d recommend to read those 2 articles:
vSphere 5.1 licensing – vRAM is gone – rather good news, any more?
ESXi 5.1 Free with no vRAM limit but physical RAM limit of 32Gb
The upgrade process from ESXi 5 free version to ESXi 5.1 free version is very straightforward. It takes 3 or 4 steps to complete. All the VMs running on the server must be shut down, because a reboot of the physical host is necessary.
ESXi 5 Free – upgrade to ESXi 5.1 – the steps:
01. Download the offline bundle for ESXi 5.1 at VMware (you’ll need to login through My VMware, or if you don’t have an account, you can create one for free) – file called VMware-ESXi-5.1.0-799733-depot.zip . It’s a 298Mb zip file.
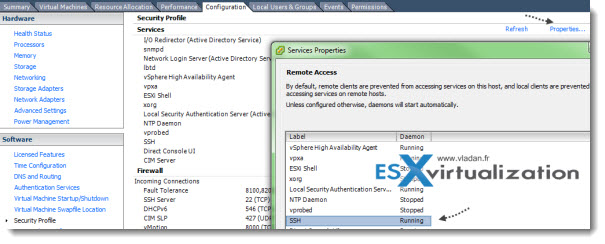
02. Activate SSH and shut down all your VMs running (if not already activated) . You can do it through the vSphere client. Configuration > Security Profile > Properties
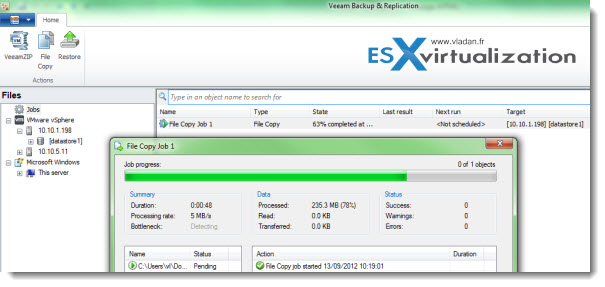
03. Next thing you’ll need to do is to upload the bundle zip file which you just downloaded to the local (or shared) datastore of the ESXi server. You can use the vSphere client and the datastore browser for that or you can use the faster VeeamZIP Free by creating a copy job for the upload of the file to the datastore.
03. Connect by using Putty and execute the following command:
esxcli software profile update -d /vmfs/volumes/datastore1/VMware-ESXi-5.1.0-799733-depot.zip -p ESXi-5.1.0-799733-standard
UPDATE:
Or, you can also invoke this command:
esxcli software profile install -d /vmfs/volumes/datastore1/VMware-ESXi-5.1.0-799733-depot.zip -p ESXi-5.1.0-799733-standard
04. Reboot the server and you’re done.
In case you want to revert back, just press Shift+R at the boot loader screen…
UPDATE: If you want to upgrade to latest ESXi 5.1 (build 838463), you should see this KB article: VMware ESXi 5.1, Patch Release ESXi510-201210001 and get this file, ESXi510-201210001.zip , from the VMware download page.
Then use this command (if you’re on ESXi 5.x):
esxcli software vib install -d /vmfs/volumes/[DATASTORE]/[PATCH_FILE].zip
UPDATE 2: If you’re running the free version of ESXi, then put the host into maintenance mode first, then run the command. If you don’t, you might get an error message saying “cannot be live updated” (see the comments bellow).
If you’re running ESXi 4.1 use this command:
esxupdate –bundle=<zip> update
This post – ESXi Free – how to upgrade to ESXi 5.1 – was published on ESX Virtualization website atvladan.fr.
Feel free to subscribe to our RSS Feed.
The Official VCP5 Certification Guide book (New) available at Amazon.
Best VMware Software
VMware Workstation 9
VMware Fusion 5.0.1
VMware vSphere 5 Essentials
VMware vSphere 5 Essentials PLUS


